




Bad deliverability is almost never a copy problem. It’s an infrastructure problem. If your cold emails are landing in spam, the fix isn’t a better subject line — it’s a properly built cold email setup: the right domains, correctly configured DNS records, warmed mailboxes, and a sending service that doesn’t work against you.
This guide covers everything you need to build cold email infrastructure that lands in inboxes consistently.
Why Cold Email Infrastructure Matters
Never use your main domain for cold outreach
Your main domain carries your brand’s sender reputation — transactional emails, customer communications, everything. Cold email generates spam complaints. Even a small complaint rate above 0.1% triggers Gmail throttling. If that hits your main domain, your whole email operation suffers.
Register dedicated sending domains (tryacme.com, acme-hq.com) and keep your main domain completely separate from cold outreach.
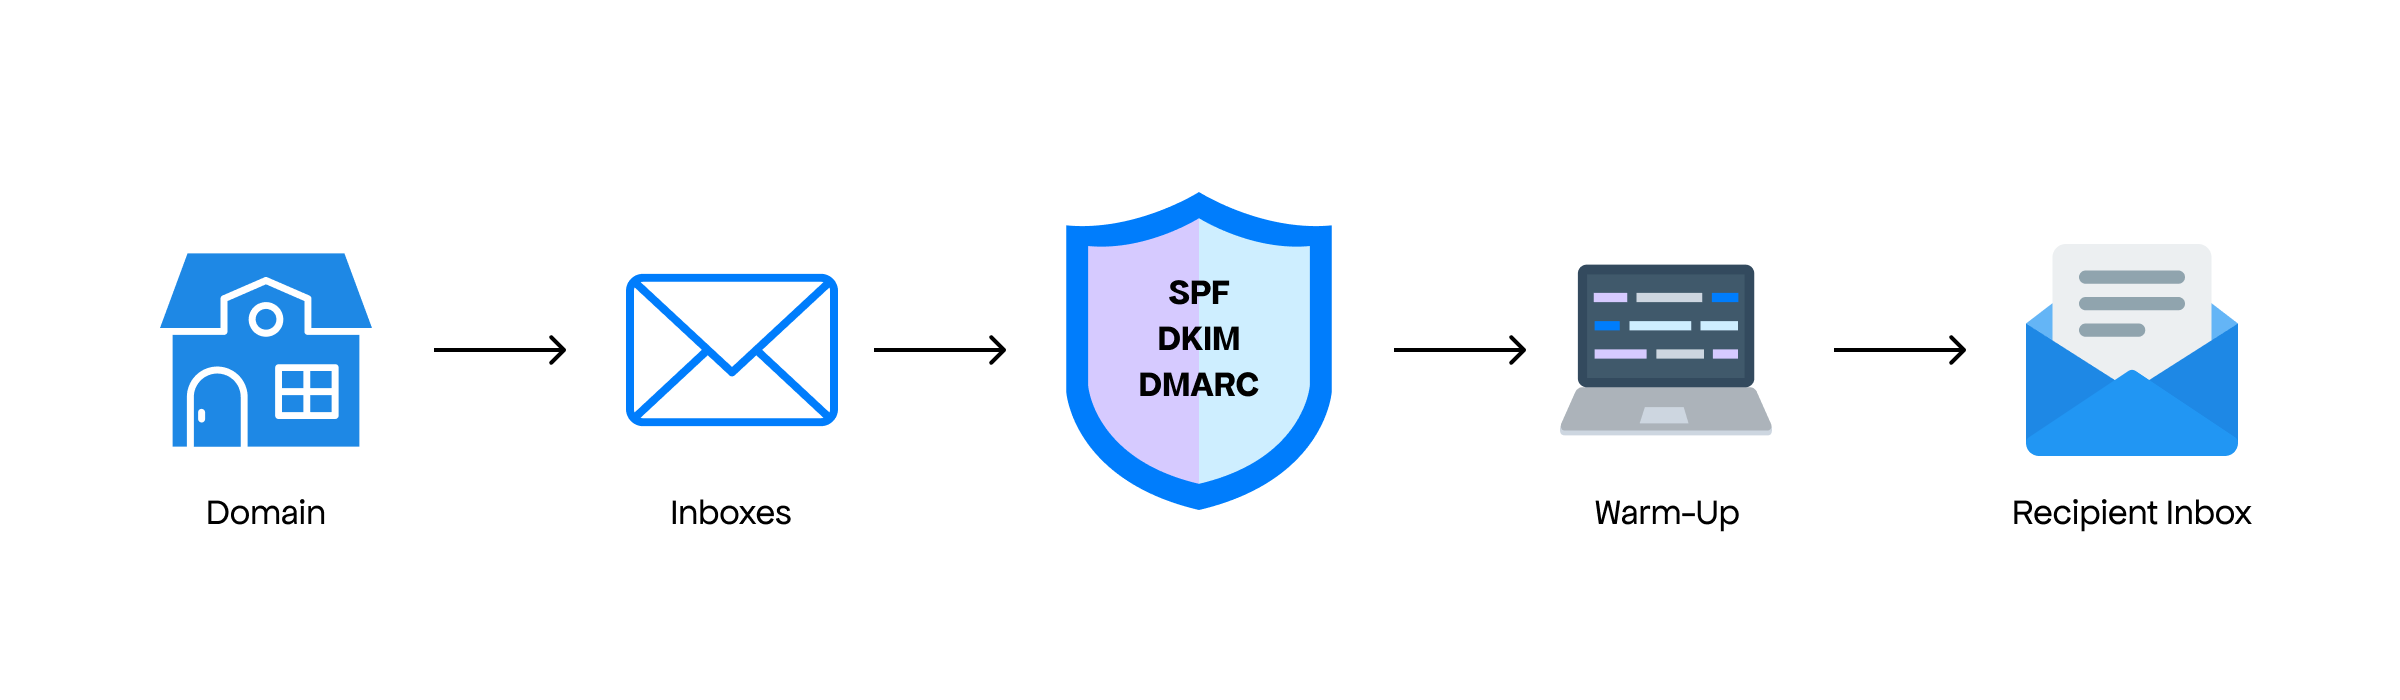
What a solid cold email setup includes
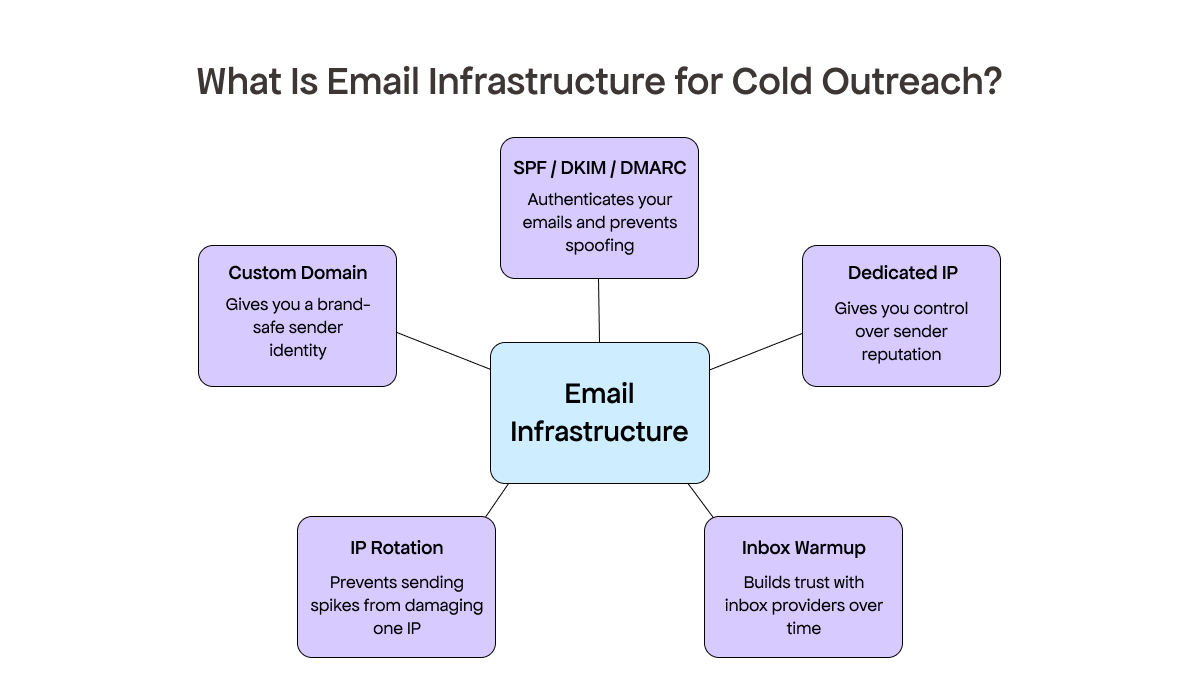
• Dedicated sending domains — separate from your main domain
• SPF, DKIM, and DMARC records — correctly configured on each domain
• Custom tracking subdomain — so you’re not on shared tracker infrastructure
• Warmed mailboxes — with a gradual sending ramp, not a cold start
• A reliable cold email sending service — with reply detection and deliverability monitoring
Cold Email Domain Setup: Step by Step
Pick a sending domain that looks legitimate
Use a variation of your brand: tryacme.com, getacme.com, acme-team.com. Avoid anything that looks disconnected or throwaway. Register it at least 2–4 weeks before you plan to send — domain age is a trust signal. Set up a 301 redirect to your main site so the domain resolves to something real.
Configure SPF, DKIM, and DMARC
These three DNS records tell inbox providers that your emails are legitimate. Without them, a large portion of your sends will be silently routed to spam — no bounce, no error, just no results.
• SPF: lists which servers are allowed to send from your domain. Keep it under 10 DNS lookups or it fails silently.
• DKIM: adds a cryptographic signature to every email. Both your mailbox provider and sending service need their own DKIM record.
• DMARC: tells inbox providers what to do when SPF or DKIM fails. Start with p=none to monitor, then move to p=quarantine once authentication is confirmed working.
Use VitaMail’s free SPF Checker to verify your SPF record is correctly configured before your first send.

Set up a custom tracking domain
Most cold email sending services track opens and clicks through a shared subdomain. That means your emails share tracking infrastructure with every other sender on the platform. Add a CNAME record pointing a subdomain (track.yourdomain.com) to your sending service’s tracking servers. Takes 5 minutes and removes a common deliverability risk.
Mailbox Setup and Sending Limits
How many mailboxes per domain
Use 2–3 mailboxes per sending domain. All mailboxes on a domain share its reputation — if one gets flagged, all suffer. For 200–300 cold emails per day, two domains with two mailboxes each (50–75 emails per mailbox/day) is a practical and safe setup.
Google Workspace vs. Microsoft 365
Both work. Google Workspace has better inbox placement for Gmail recipients (40–60% of most B2B lists). Microsoft 365 performs better for corporate Outlook inboxes and has higher sending limits. If you’re starting with one, Google Workspace is the safer default.
Daily sending limits
New mailboxes should never start at full volume. Ramp gradually:
• Week 1: 20–30 emails/day
• Week 2: 30–50 emails/day
• Week 3: 50–75 emails/day
• Week 4+: 75–100 emails/day (sustainable ceiling)
Stay under 100 emails per mailbox per day. More volume means more domains and mailboxes, not pushing individual limits.
Domain Warmup: Building Reputation Before You Send
What warmup does
Inbox providers have never seen email from a new domain before. Warmup builds sending history — real opens, replies, and inbox moves — that signals your domain is used for legitimate communication. Without it, your cold emails start from zero trust and get filtered aggressively.
Warmup schedule
Run an automated warmup tool from day one alongside your real sends:
• Days 1–7: warmup only, no cold sends
• Days 8–14: begin cold sends at 10–20/day per mailbox
• Days 15–21: scale to 30–50/day per mailbox
• Day 30+: 75–100/day per mailbox, warmup running continuously in the background
Don’t turn warmup off after the initial period. Running it continuously maintains your reputation signal on low-volume days.
Choosing a Cold Email Sending Service
Your cold email sending service sits on top of your infrastructure — managing sequences, detecting replies, and surfacing deliverability data. What to look for:
• Reply detection that pauses sequences automatically
• Built-in warmup or clean integration with warmup tools
• Deliverability monitoring with alerts, not just post-campaign reports
• SPF, DKIM, and DMARC verification before sending
• Per-campaign metrics: open rate, reply rate, bounce rate, complaint rate
On shared IPs, your reputation is partly determined by other senders on the same IP. Choose a cold email sending service with a well-managed sending pool, or move to dedicated IPs once you’re above ~50,000 sends per month.
Keeping Your Infrastructure Healthy
Validate your list before every send
Email lists decay at 20–30% per year. A single campaign sent to a decayed list can spike your bounce rate above 2% — enough to trigger domain filtering that takes weeks to recover from. Run VitaMail’s Email Validator before every campaign, not on a monthly schedule.
Watch these four numbers
• Open rate below 20%: subject line or deliverability issue
• Bounce rate above 2%: validate your list immediately, pause sending
• Spam complaint rate above 0.1%: audit targeting and unsubscribe flow
• Domain reputation drops in Google Postmaster Tools: check SPF, DKIM, and recent complaint rates
Check for spam triggers before launch
Modern spam filters analyze HTML structure, link density, authentication gaps, and content signals — not just trigger words. Run every campaign through VitaMail’s Spam Checker before it goes out. It flags broken unsubscribe links, authentication issues, and content problems with specific fixes. Ten minutes before launch is worth it.
Your Cold Email Infrastructure Is Either an Asset or a Liability
Properly built cold email infrastructure — dedicated domains, correct DNS authentication, warmed mailboxes, the right cold email sending service — compounds over time. Better deliverability, stronger sender reputation, more replies per campaign.
Start with VitaMail’s free tools: check your SPF record, validate your list, run your email through the spam checker. Three steps, ten minutes, and you’ll know exactly where your cold email setup stands.